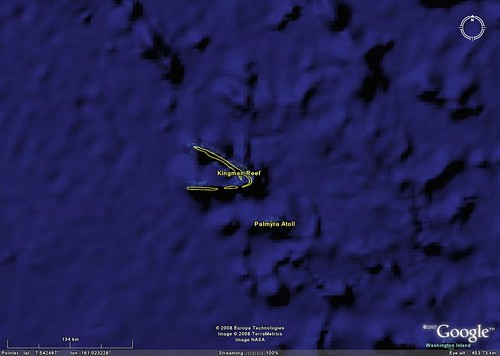
Very Large Kingman Reef - Vector Shoreline View from Google Earth
This is the map that got me started on the mysterious very large Kingman Reef. The sides of the reef are depicted as 140-kms in length. Whereas Kingman Reef is actually a 1/10th of that size. Somebody misdigitized the reef, most probably in the early days of government produced vector maps. Oh, well, that's another story for another time. Meanwhile, let's talk about creating a nifty georectified image overlay and placing it into Google Earth (GE).
Using Global Mapper v9.0 (GM), the process to take an image, georectify it, export it as a KML/KMZ formated file and finally load it into GE is, as my title promises, quick, accurate and easy. How quick - about 2 to 5 minutes, depending on the complexity of the georectifying needed. How accurate - as accurate as you are able to georectify your image against known coordinates. How easy - even a caveman could do it. (I really do dislike that commercial, but it works here.)
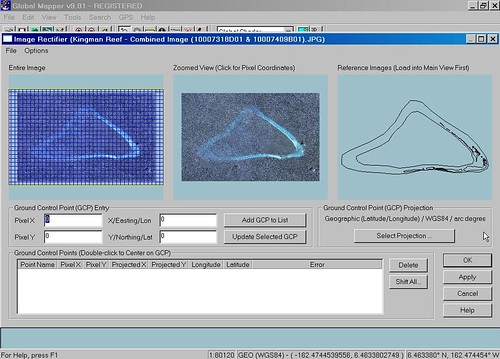
Georectify Image
Step 1 - Georectifying an image using GM's process, lets you compare known coordinates (my previously constructed vector files of Kingman Reef) to my image (DigitalGlobe preview image composite of Kingman Reef). I typically create 3+ Ground Control Points (Affine). The GM windows allow for zooming to enable extremely precise georectifying of an image.
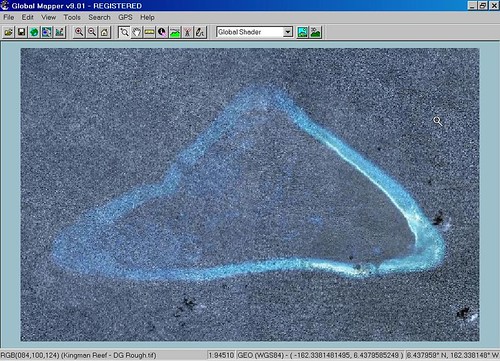
Georectified Image
Step 2 - Admire your work! If the image is whacked, you can go back into the georectifying process and fix it. I am an old pro at this, so my images typically line up just fine with my original vector files.
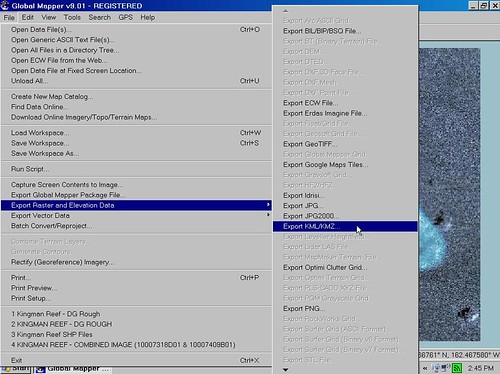
Export Georectified Image as KML/KMZ File
Step 3 - Select File option and Export Raster and Elevation Data. You are given a list of export options. Select Export KML/KMZ.
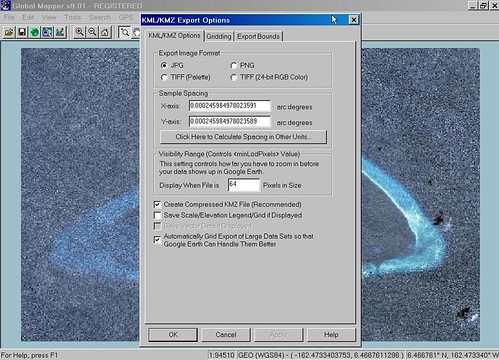
Format Your Image KML/KMZ File
Step 4 - My georectified image of Kingman Reef is small and is the only image loaded into my work area, so when it comes to KML/KMZ formatting options, I stick with default choices. If this were a very large image (many MBs), I would be able to grid it into manageable file sizes and load each one into GE. I use the KMZ file format. The zipped image and geocoding data take up much less space and load fast into GE.

Name and Save Your KML/KMZ File
Step 5 - Name your file and save it.
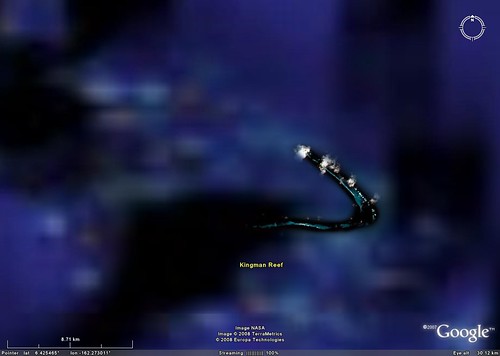
Kingman Reef - Landsat ETM+ Image from Google Earth
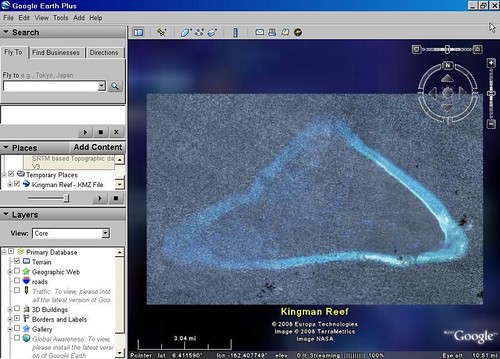
Double Click File and Enjoy Your Georectified Image in Google Earth
Step 6 - Now for the fun part. (Make sure you have GE loaded into your computer.) Double click your newly created Kingman Reef KMZ file, pause and then admire your work in GE. If you want to share your image overlay with the world, sign into GE and share away. If you just want to admire your handiwork, admire away!
Like I promised - using Global Mapper v9.0, the process to georectify, export and load an image into GE is quick, accurate and easy. Give it a try.
Enjoy!
No comments:
Post a Comment